

Table of Contents
- Tip 1: Use a right camera!
- Tip 2: Use a tripod!
- Tip 3: Choose a right background!
- Tip 4: Do not use a flash!
- Tip 5: Use lighting damper!
- Tip 6: Take photos in the daylight!
- Tip 7: Stick to the uniform lighting type!
- Tip 8: Use zoom!
- Tip 9: Use digital filters with care!
- Tip 10: Better take pictures in color!
- Tip 11: Choose the right file size directly when taking photos!
- Tip 12: Edit your product images on the computer!
Good product photos are an irreplaceable part of every product detail page in an online store. Customers evaluate products primarily through images because that's in human nature. Qualitative and professional product photos are thus even more important than good product descriptions or their ratings.
Creation of qualitative and professional looking product photos is one of the most important tasks for every store owner. Of course, you can hire a professional photographer, but small online retailers and startups cannot afford that much expense.
In this article we give you twelve practical tips on how to take product photos better.
Tip 1: Use a right camera!
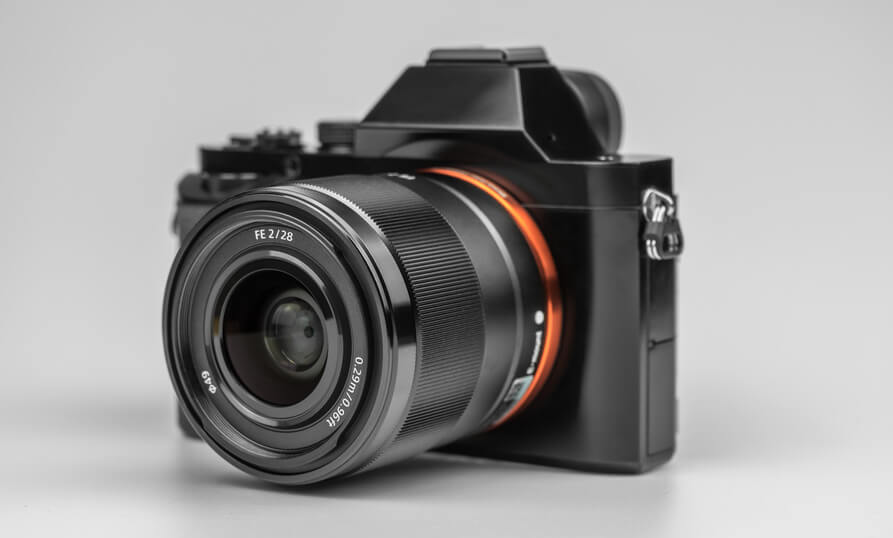 The first step to well-made product photos is, of course, a good camera. The photo equipment can be either bought or borrowed. The digital market offers a wide range of different cameras and photo equipment. A good and suitable camera can be purchased from 300 €. For product photos, a system camera or DSLR (Digital single-lens reflex camera) are recommended.
Such cameras allow to manually adjust all the necessary parameters to make good-looking product photos, e.g. the aperture, shutter speed or ISO value. Good compact cameras or even smartphone cameras with more than twelve megapixels could also be used, but the quality of the results will be noticeably worse.
Tip 2: Use a tripod!
 Whether you use a professional camera, a compact camera or even a smartphone camera, you need a tripod. The tripod fits for big products as well as for small products. This accessory is a real helper to improve the quality of product photos and to create them uniformly in one style. You get:
- really sharp pictures,
- the same shooting angle for all photos,
- a good exposure of the products,
- a white background that is really white, if desired,
- if necessary, high depth of focus.
Tip 3: Choose a right background!
 When building a set, it is very important to choose the right background. Neutral, light and monochrome background is recommended. Try to create as much contrast as possible between the background and the product. For example, use a large white or gray cardboard or paper. If your product type allows, you can even take light wood or, for example, a simple pattern as a background. Make sure that your product does not "disappear" on the background. Carpets, tables without underlay do not fit! But there is still another way to choose a suitable background - you can crop the image in a program for image editing and put on the selected background. You can either do this by yourself or you can find a graphic designer on the internet who will take care of the entire image processing from € 1 per photo.
Tip 4: Do not use a flash!
The flash produces harsh shadows and fades the colors. It leads to the reproduction of unnatural colors of products, what is undesirable for product images. It is better to use additional lighting equipment to shoot really good product images.
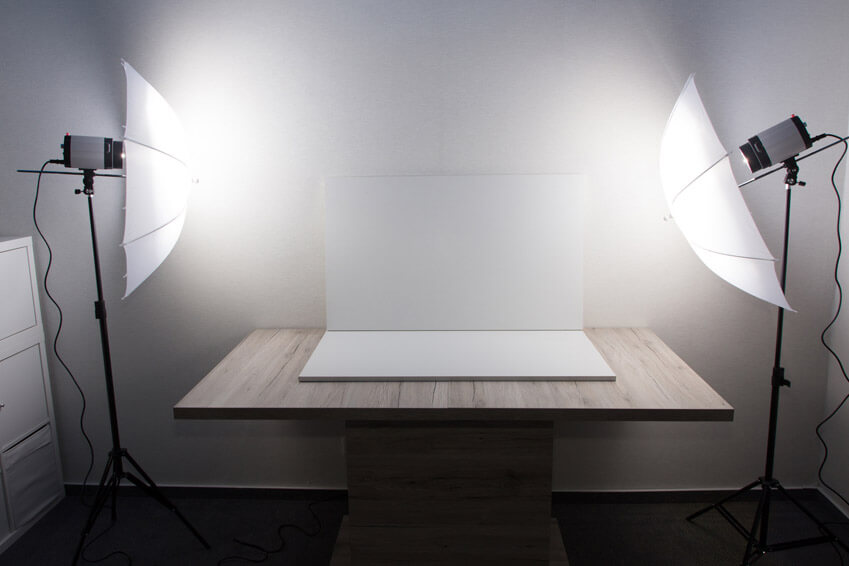
Tip 5: Use lighting damper!
For high-quality product photos a harmonious light scattering is particularly essential. To create such an effect, you do not need to buy new things! Lightweight fabrics hanging over the light are also suitable. The goal is simply to dampen the lighting.
Tip 6: Take photos in the daylight!
Good lighting is the most important component for good product images. Try to photograph in daylight if possible. Windows and door entrances can also serve as the light sources. It is important not to photograph in the light source. But avoid thereby shadows. Use a softbox to create a diffused light. On cloudy days, clouds can serve as the natural diffuser, because they filter the light. With evenly distributed light, without strong shadows and direct sunlight, you can make really good product photos.
Tip 7: Stick to the uniform lighting type!
In order not to get different-looking product images, choose a uniform lighting concept and adhere to it. Different light sources create different types of shadows in your pictures: blue in the natural light and yellow in the room. Such a big difference does not fit with uniform looking product photos.

Tip 8: Use zoom!
For reproduction of details or small objects, the zoom is simply irreplaceable. But use only the optical zoom, because the digital zoom quickly becomes blurred. Blurred product photos are taboo. With a good lens you can easily use a value of 50 to 80 mm with a DSLR.

Tip 9: Use digital filters with care!
Certain filters can make high-quality photos from average product photos. Use them with caution, because digital filters can make the product colors look less real. Do not confuse your customers about the correctness of the product colors!
Tip 10: Better take pictures in color!
When the question arises as to whether a product should be presented in color or in black and white, the answer is usually: in color. In product photography, black and white pictures rarely make sense. Product photos are used not only for presentation, but also for the reproduction of the material type, the color, the quality and the benefits of a product. Black and white photos do not provide all this information to your customers.
Tip 11: Choose the right file size directly when taking photos!
Pay attention to the set quality on your camera, because the file size directly depends on the quality. First, you need to determine if you want to print the product images, show them via PowerPoint, or just publish them on the web and send them by e-mail. For printing you need the highest quality. For Powerpoint the average quality of the product images is suitable. For a web publication as well as for sending by e-mail, the lowest quality is enough. Low-quality product images save your storage space. However, this storage space is cheap, so you should take photos in the best possible quality, and you can still reduce the size of the images.
Tip 12: Edit your product images on the computer!
 Even with the best camera and photographic equipment, you can be not enough satisfied with your product images. There are available many editing programs for images. In addition to the paid Photoshop there are e.g. such good alternatives to choose from: Gimp, Snapseed or Pixlr-o-matic. With the right software, you can make tonal corrections, change the size, increase the brightness, make color adjustments, change contrast, etc. But be careful not to overdo the post-processing of your product photos. As mentioned above, you can also hire a graphic designer on the internet, who will do it professionally for you.
With these twelve practical tips you can easily create product photos for your own online store. You only need practice. Over time, you will create all the product photos intuitively. You will get a sense of when to press the trigger and which light to use, how to show this or that product, how much you have to zoom. Your skill only gets better with time, because practice makes perfect!